ch-ch-ch-changes
as you may have noticed, there have been some changes around the blog. it's still a work in progress, so please excuse the mess while we're under construction! ;)
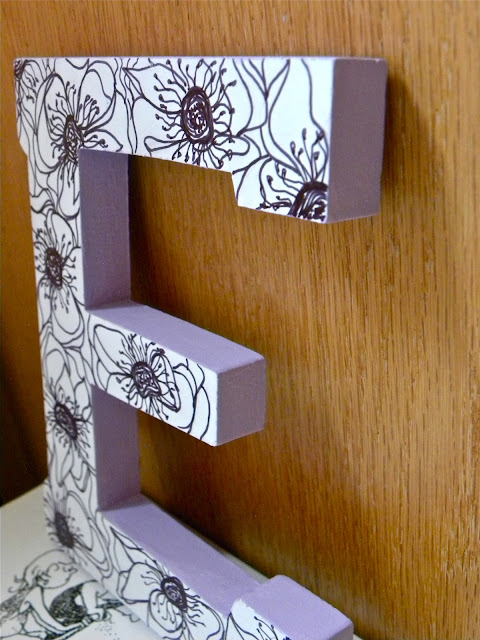
e is for [e]ffervescent.
Hello friends! Here is a little project I did today after work that I wanted to share. I've had this E from Michaels sitting around forever, waiting to be decorated. All you need for this is a letter/shape and supplies to decorate with! For mine I just copied one of my favorite patterns of anemones onto my letter with sharpie and then painted the edges and back a lilac/lavender-ish color that I mixed up (so obsessed with this color) so it could be reversible. You could also glue on pretty paper or scraps from a magazine or a bit of wallpaper or paint on a cool design or keep it simple with some black and white stripes or chevron...whatever you want!
geometric wood necklace
When I started this project, I wasn't sure that it was going to work out...I ended up having to change around my design, but I ended up being really happy with the final product even though it wasn't what I had originally planned on. I would like to experiment more with this project and try out different materials and designs.
-Paint and paintbrush (I used an acrylic metallic copper color and added yellow and white to lighten it)
-Scissors or an exacto knife
-Jump rings
-A chain (make sure it's made up of rings that are big enough to fit the jump rings through)
-A thick sewing needle
-A piece of thin wood that can be cut easily with scissors or an exacto knife

Step 1: Draw your design onto the piece of wood with pencil. I originally wanted to make the necklace out of small triangles but the wood was too fragile to do this and would split along the grain when I tried to cut it, so I figured out a design that used the wood grain. If you want to do a different design I would recommend getting thicker wood (this might also mean you need something more heavy duty to cut out your pieces though).
 Step 2: Cut your pieces out with scissors or an exacto knife. Be very careful and gentle when you do this so you pieces don't split.
Step 3: Paint each side of your pieces of wood (including the edges). I made mine a very subtle color that got lighter towards the middle, but you can experiment with different colors or even paint designs on them.

Step 4: Use a needle to poke a hole through the top of each piece (or wherever you want to put your jump rings). Poke it through a few times to make sure the hole is wide enough. I would recommend that while you do this you squeeze the sides of the piece together so you don't split your wood down the middle.

Step 5: Insert your jump rings through each hole. Touch up the paint if necessary once you've done this.

Step 6: Attach each jump ring to the chain (remember to measure the length of your chain beforehand and make sure the pieces are centered). You might need to use small pliers to close the jump rings.

Step 7: Attach a jump ring to one end and a clasp to the other.
That's it!
diy necklace inspiration
cutest paper baggies
The other day I went to Joann fabric (not sure what my excuse was this time...) and found the cutest little metal paper fasteners (these ones are similar). Ever since I bought them I have been attaching them to everything...they make everything a little sweeter. I thought I'd throw together a quick little diy for the little paper bags I used them on for the chai project, in case any of you decide to do the same.
Directions:
1) Take a paper shopping bag or craft paper and cut out a rectangle that is an inch or so longer than you want your baggie to be and twice as wide as you want it to be, plus an inch or so.
2) Fold the sides down so that they overlap in the middle by around a half inch.
3) Glue the flaps together along the overlapping areas.
4) Fold a flap of about 1/2 inch at the bottom.
5) Using the fold as a guide for where to start, cut off the two bottom corners.
6) Cut off the top flap, along the bottom of the bag.
7) Glue the remaining flap down.
8) Fold down the top (about a 1/2 inch) and poke a fastener through the middle (you may need to use an exacto knife to cut a little slit). You could also tape it down with washi tape or pull a ribbon through two vertical slits and tie a bow...whatever you want!
Off to bed now...night!
Chai Tea Gift DIY
Hello! Sorry I've been so bad about updating the blog lately...I've been trying to get things going with my thesis research and get in some more hours at work (if these visits to Michaels continue at this rate I'm going to need to start making more monies...!). Here is a project I've done before as little presents for friends. Homemade chai is one of my favorite things ever and its actually really easy to make from scratch if you have all of the spices on hand. This home-made gift also includes a pretty container that can be used for other things once the tea is gone...handy, huh?
You will need an empty tea canister or other container (you can get tin and cardboard containers in different shapes and sizes at Michaels and Joanns)--just make sure its big enough to fit all the ingredients. You will also need craft supplies to decorate the container, such as pretty paper, washi tape, ribbons, lace, double-sided tape, glue, etc. The rest of the supplies are optional--I used paper shopping bags and heart paper fasteners to make little bags for the ingredients, but you could also buy little bags or use plastic sandwich bags.
For the chai you will need these ingredients:
-4 whole cloves
-2 cardamom pods (crush them a little)
-1 cinnamon stick, broken into a few pieces
-1 small piece of ginger, peeled and chopped up (about the size of a small grape)
-1/8 tsp ground black peppercorns
-2 tablespoons black tea (preferably Assam, but I usually use whatever we have on hand and it always tastes fine)
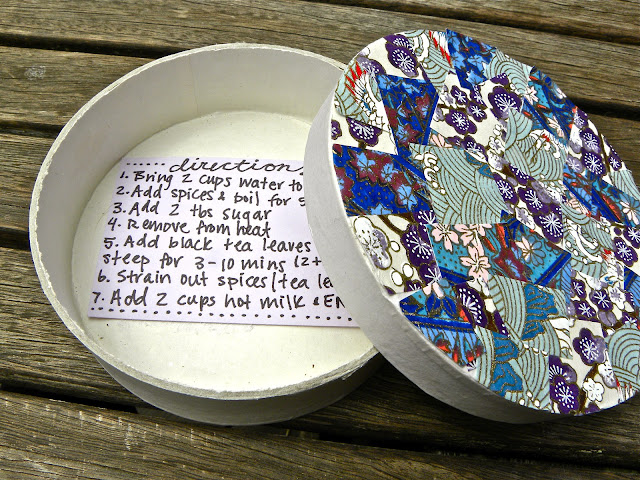
First, decorate your container. For one I used washi tape to cover the whole canister and then used double sided tape to attach lace trim to the top. For the other container I cut up different patterned origami papers and glued them to the top, then tied on a matching ribbon.
Next put the ingredients into your baggies. You should put the tea leaves in a separate bag since they need to be put in separately from the spices. In one of my containers I was able to fit two bags of ingredients so two rounds of tea can be made (I just put all of the tea leaves needed for both into one baggie).
Make sure you write these directions out and put them in the container (you could glue them to the bottom of your container or roll them up and fasten them with some washi tape or a ribbon):
1) Bring 2 cups of water to a boil
2) Add spices and boil for 5-10 minutes
3) Add 2 tablespoons of sugar
4) Remove from heat
5) Add 2 tablespoons black tea leaves and let steep for 3-10 minutes (until desired strength)
6) Strain out spices/tea leaves
7) Add 2 cups hot milk and enjoy!
That's it! Oh, and you should probably make a little chai for yourself to drink while you admire your work... (PS a quick diy for those little paper baggies will be up soon!)
Subscribe to:
Comments (Atom)


